The History and Logistics Behind the Creation of the
Goddess Temple Dioramas
When my daughter Maraya was eleven years old, she asked me to “Use all of your white LEGO bricks and make me a goddess temple.”
“No boys allowed,” she said, and that was the start of Goddess Temple Diorama project.
The Temple went through many variations over the 5 years it took to be totally finished.
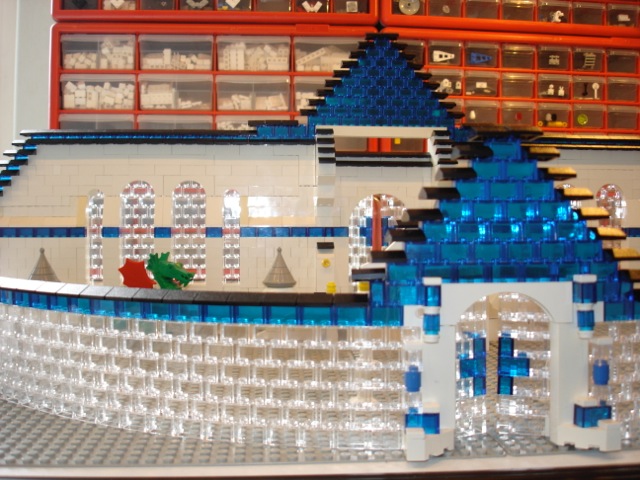
I did many LEGO “Sketches” at each phase of the building of the temple. Above is one of the first LEGO sketches I did of the front of the temple. A LEGO sketch is a simple “reality check” build to figure out the form, function and proportions of a design idea before attempting to make a full and more detailed project. This particular build was to sketch out the basic window design for the front of the temple and to find out if I could construct a curved LEGO wall that would not break apart under the “Curving” pressure. It worked. Yeah ! See the head of the green dragon poking up over the curved glass wall? Back then, that was the only LEGO dragon LEGO had produced. By the time the build was completed there were larger, more elaborate LEGO “Hogworts” dragons available. So in the developing story line that Maraya and I created as the build progressed, the little green dragons became the baby, or junior dragons.
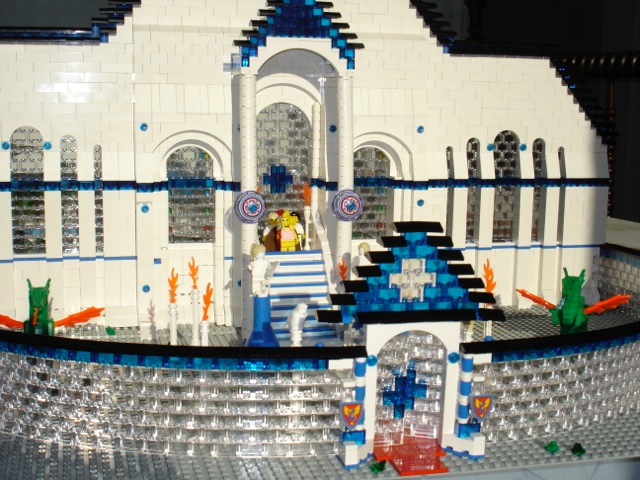
Five years and many temple versions later, this was the finished front of the temple. Compare the simple “Sketch” with the fuller and more detailed final build.
Many people have asked me, “How do you make a curved wall out of square LEGO bricks?”
1 by 2 LEGO bricks have some “Give” in their connecting points. If you have 1 by 2 bricks connected together but not connected to a base plate, they can be bent in some respects in to a curve that can curve all the way into a cylinder. But in that curved shape, the bottom of the bent wall can’t fit into the “studs” of a base plate.
I made the clear plastic LEGO bricks bend into a curved wall and then I anchored the wall at the entrance gate and the temple wall to keep the curved shape solid. I “floated” the curved wall itself just above the base plate in-between those two anchor points. I created many exploding curved LEGO wall experiments before achieving a success. And at first, the solution to the problem was simpler than my mind could comprehend. Sometimes less engineering is more.
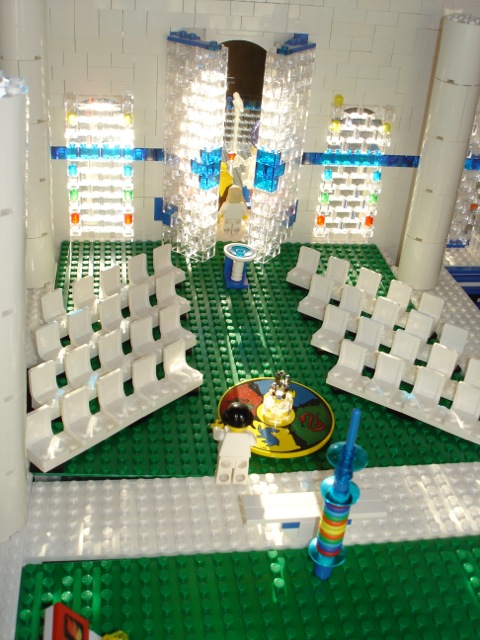
In this picture you are looking at a sketch of the Alter room floor plan. You’re seeing the front entrance from inside of the temple. The interior of the temple also went through many changes during the build. In this early version, I had regular church style seating.

That seating arrangement soon changed into concentric circles of chairs as Maraya’s and my ever developing story about the temple reviled that there was not just one high priestess, but four Elder Crones, that represented the four elements and four paths. We had to place them and their initiates in some sort of equal seating arrangement. Concentric circles of chairs was the perfect solution.
Besides, I like circle seating.
Chicken or egg thinking built the goddess temple and the story line around it. Sometimes the build dictated the story, and sometimes our developing story line about the temple dictated how it was built. This is also true for the story lines and the builds inside the LEGO dioramas that the temple inspired.
In the picture above, you can look into the temple from the side. That is because the temple wall has been laid down flat on its hinges for access into the room for the picture and for play time. The temple roof has also been taken away, but you can see in this picture how the internal temple pillars could hold up the roof even if the wall was down.
Notice the wizard siting against the other side wall. By the time the temple was at this stage of the build, Maraya decided that boys/men could visit the temple, but only during the day time.

Here is a view of the Angel Alter with the temple goddesses, initiates, priestess and crones, all in the room at one time. We used nearly every female LEGO Mini-fig that I had for this “plenum” meeting.
Notice the brooms sticking out of the container in the bottom left hand side of the picture. There are witches here and the brooms are not just for cleaning.
For these first few years I was designing and building the different variations of the temple as mini-figure doll houses for Maraya.
Besides building a one piece removable roof and one side of the temple wall that could be lowered on hinges. I also built and the back wall of the temple as a hinged door that could be opened. That way by removing the roof, lowering the side wall of the temple on its hinges and/or opening the back door, Maraya had easy access into the temple for play time.

It is not easy to get LEGO constructions to span a big distance from one point to another without bending or giving in to its own weight. To solve that problem I made the whole roof solid by filling it with interwoven LEGO “Plates.” But if I had used regular LEGO roof tiles, the angle of the roof would have been so steep that to fill it’s large 30 or 45 degree triangle core with criss-crossing LEGO plates would have made it to heavy for Maraya to lift by herself.
I solved that technical problem by using the thin LEGO railroad ramps normally used for LEGO cars going over LEGO railroad tracks. That created a low angled roof that only had 8 pounds of LEGO flats inside of it for internal strength.
Here is how the hinged wall works:


With the roof taken off and the side wall lowered down, it is easy to get into the Alter room and the two rooms behind the Alter. Those two rooms are the Crone’s bedroom and the witches’ alchemy room.
Normally the clear plastic wall, seen on the left of this picture would extend all along the side of the recreation area. The hinged temple wall would sit perfectly flat on top of the clear plastic parameter wall and not crush the LEGO minifigs below. I had removed the parameter wall to take pictures of some the outdoor recreation area.
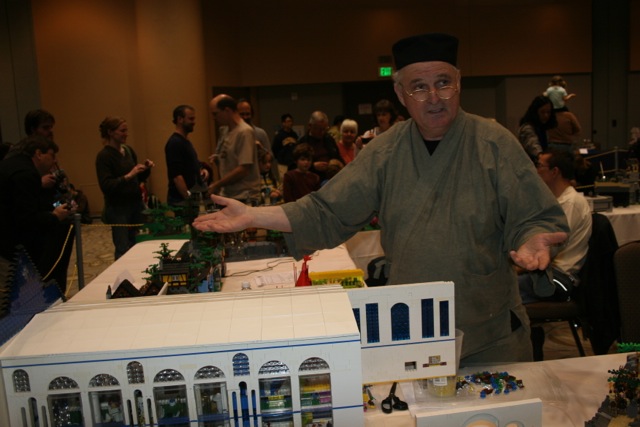
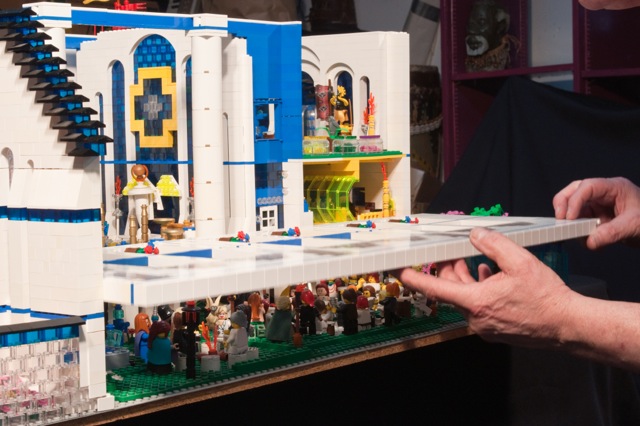
This picture shows me showcasing the door in the back wall of the temple. I designed it to give Maraya easy access to the two back rooms without having to remove the roof and/or laying the temple’s hinged wall on its side.

In the above picture, I am holding the witches Alchemy room that I slid out from the back of the Temple.
As a part of that system I designed, I built the two back rooms in the temple on basic LEGO 32 stud base plates. These base plate rooms easily fit into a rail support system I built, that would allow the Crone’s bed room and the Alchemy room to be independently slid out of the back door wall of the Temple like drawers, so that they could be played with outside the temple.
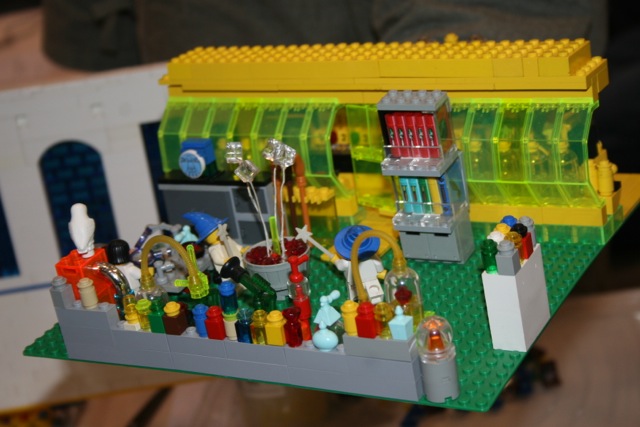
A closer look at the witches’ alchemy room. The witches are concocting a brew.

A closer look at the Temple Crone’s bedroom. I had fun making the crone’s four poster canopied bed.